MacOS
Most of MacOS workstations do not have any NVIDIA graphic boards, hence they cannot run CUDA, for MVS part. So compiling and using Meshroom is not exactly straightforward. However, Ryan Baumann has compiled his own Homebrew tap which includes the necessary formulae, and you can use this post to get an idea of how to use them to get up and running. Note that this is intended as a first step for Mac users wishing to experiment with and improve the AliceVision/Meshroom software, and as a result these instructions may become outdated with time.
System Requirements
First off, your Mac will currently need some NVIDIA GPU with a CUDA compute capability of 2.0 or greater. This is probably a pretty small portion of all Macs available, but you can check your GPU by looking in “About This Mac” from the Apple icon in the top left corner of the screen, under “Graphics”. If you have an NVIDIA GPU listed there, you can check its compute capability on the NVIDIA CUDA GPUs page.
Second, you’re going to need to install the latest CUDA toolkit. As of this writing, that’s CUDA 10.1, which is only officially compatible with OS X 10.13 (High Sierra), so you may also need to upgrade to the latest version of High Sierra (but not Mojave!) if you haven’t already. Alongside this it is aloso suggested to instal the latest NVIDIA CUDA GPU webdriver, which as of this writing is 387.10.10.10.40.118.
Third, CUDA 10.1 is only compatible with the version of ``clang`
distributed with Xcode
10.1 <https://docs.nvidia.com/cuda/cuda-installation-guide-mac-os-x/index.html>`__,
and will refuse to compile against anything else. You may have an older
or newer version of Xcode installed. As of this writing, if you fully
update Xcode within a fully updated OS X install, you’ll have Xcode
10.1. To get back to Xcode 10.1, what you can do is go to Apple’s
Developer Downloads page
(for which you’ll need a free Apple developer account), then search for
“Xcode 10.1”, then install the Command Line Tools for Xcode 10.1 package
for your OS version. After installing, run
sudo xcode-select --switch /Library/Developer/CommandLineTools and
then verify that clang --version shows
Apple LLVM version 10.0.0.
Once you’ve done all this, you can verify a working CUDA install by
going to /Developer/NVIDIA/CUDA-10.1/samples/1_Utilities/deviceQuery
and running sudo make && ./deviceQuery, which should output your GPU
information. If it doesn’t build correctly (i.e. you see
nvcc fatal : The version ('??.?') of the host compiler ('Apple clang') is not supported),
or deviceQuery errors or doesn’t list your GPU, you may need to look
over the steps above and check that everything is up to date (you can
also check the CUDA panel in System Preferences).
The following instructions also assume a working Homebrew install.
MacOS Installation
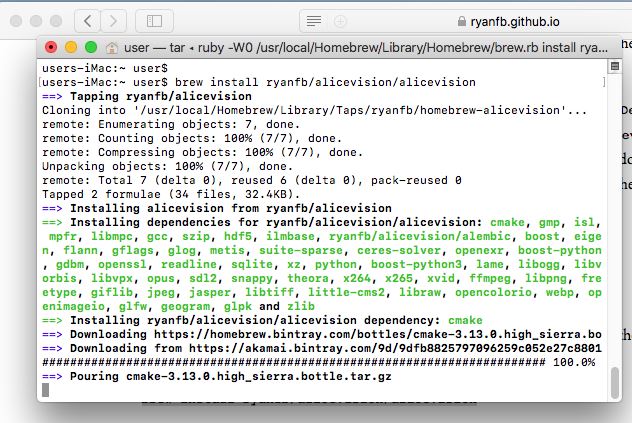
If you’ve followed all the above setup instructions and requirements, installing the AliceVision libraries/framework should be as easy as:
brew install ryanfb/alicevision/alicevision
Meshroom Installation & Usage
This tutorial does not provide a Homebrew formulae for the Meshroom package
itself, as it’s all Python
and doesn’t seem particularly difficult to install/use once AliceVision
is installed and working correctly. Just follow the install instructions
there (for my specific Python configuration/installation I used pip3
instead of pip and python3 instead of python):
wget 'https://github.com/alicevision/meshroom/archive/v2019.1.0.zip'
unzip v2019.1.0.zip
cd meshroom-2019.1.0
pip install -r requirements.txt
Note
The CUDA-linked AliceVision binaries invoked by Meshroom don’t automatically find the CUDA libraries on the DYLD_LIBRARY_PATH, and setting the DYLD_LIBRARY_PATH from the shell launching Meshroom doesn’t seem to get the variable passed into the shell environment Meshroom uses to spawn commands. Without this, you’ll get an error like:
dyld: Library not loaded: @rpath/libcudart.10.1.dylib
  Referenced from: /usr/local/bin/aliceVision_depthMapEstimation
  Reason: image not found
In order to get around this, you can symlink the CUDA libraries into
/usr/local/lib (most of the other workarounds I found for
permanently modifying the DYLD_LIBRARY_PATH seemed more confusing or
fragile than this simpler
approach):1
for i in /Developer/NVIDIA/CUDA-10.1/lib/*.a /Developer/NVIDIA/CUDA-10.1/lib/*.dylib; do ln -sv "$i" "/usr/local/lib/$(basename "$i")"; done
You can undo/uninstall this with:
for i in /Developer/NVIDIA/CUDA-10.1/lib/*.a /Developer/NVIDIA/CUDA-10.1/lib/*.dylib; do rm -v "/usr/local/lib/$(basename "$i")"; done
You may also want to download the voctree dataset:
curl 'https://gitlab.com/alicevision/trainedVocabularyTreeData/raw/master/vlfeat_K80L3.SIFT.tree' -o /usr/local/Cellar/alicevision/2.1.0/share/aliceVision/vlfeat_K80L3.SIFT.tree
Then launch with:
ALICEVISION_SENSOR_DB=/usr/local/Cellar/alicevision/2.1.0/share/aliceVision/cameraSensors.db ALICEVISION_VOCTREE=/usr/local/Cellar/alicevision/2.1.0/share/aliceVision/vlfeat_K80L3.SIFT.tree PYTHONPATH=$PWD python meshroom/ui
Import some photos, click “Start”, wait a while, and hopefully you
should end up with a reconstructed and textured mesh (here’s an example
of my own which I uploaded to SketchFab). By
default, the output will be in MeshroomCache/Texturing/ (relative to
where you saved the project file).
By default, the output will be in MeshroomCache/Texturing/ (relative to where you saved the project file).
When you launch Meshroom without sudo, the temp path will be something like this:
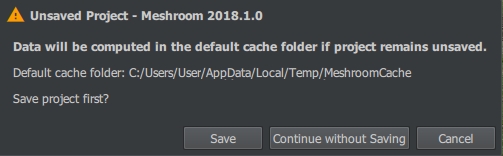
When starting with sudo, it will be /tmp/MeshroomCache by default
Footnotes:
Previously, I suggested modifying
meshroom/core/desc.pyso that the return value at the end of the ``buildCommandLine` method <https://github.com/alicevision/meshroom/blob/develop/meshroom/core/desc.py#L368>`__ instead reads:return 'DYLD_LIBRARY_PATH="/Developer/NVIDIA/CUDA-10.1/lib" ' + cmdPrefix + chunk.node.nodeDesc.commandLine.format(**chunk.node._cmdVars) + cmdSuffix
` <https://ryanfb.github.io/etc/2018/08/17/alicevision_and_meshroom_on_mac_os_x.html#fnref:dyldpath>`__
Originally published on 2018-08-17 by Ryan Baumann
This guide was updated on 2019-03-20 to reflect the latest CUDA 10.1 and Xcode 10.1 versions. The Homebrew formula was also updated to AliceVision 2.1.0 to support Meshroom 2019.1.0.
Modified for the Meshroom documentation 2019-07-25
Baumann, Ryan. “AliceVision and Meshroom on Mac OS X.” Ryan Baumann - /etc (blog), 17 Aug 2018, https://ryanfb.github.io/etc/2018/08/17/alicevisionandmeshroomonmacosx.html (accessed 25 Jul 2019).